Admin
Admin

 Number of posts : 163 Number of posts : 163
Age : 36
Location : Philippines
Job/hobbies : Webmaster
CP# : 00639156217370
Registration date : 2008-06-07
 | Subject: Hard Modding PSP Battery  Mon Sep 08, 2008 2:48 am Mon Sep 08, 2008 2:48 am | |
|  ************************************************** ****************** ^^^^^^^^^^^^^^^^^^^^^ Hard Modding PSP Battery^^^^^^^^^^^^^^^^ ************************************************** ****************** __________________________________________________ _______________ __ This for those who have absolutely no custom firmware at hand. This is a tutorial, but Pandora section is incomplete without this. This requires you to have a real steady arm and willingness to accept that things may go wrong. REMEMBER THAT Li-ION BATTERIES ARE VERY EXPLOSIVE IF NOT HANDLED CAREFULLY. You may also render the battery useless. NOTE: These methods apparently do not work or newer batteries, so get yourself some older batteries.================================================== =============== Making Switchable PSP-Slim Pandora battery {RECOMMENDED}
Following this, you will have a working and switchable Pandora-Battery
for your slim PSP.
Just use your switch now to choose the function of it!
| modified from original comments
Originally Posted by JayL
Step one:
Open your slim battery. I have used a guitar pick to do it.
Just slide the pick or whatever you use along the join between the upper
and lower half of the battery while breaking it open carefully.
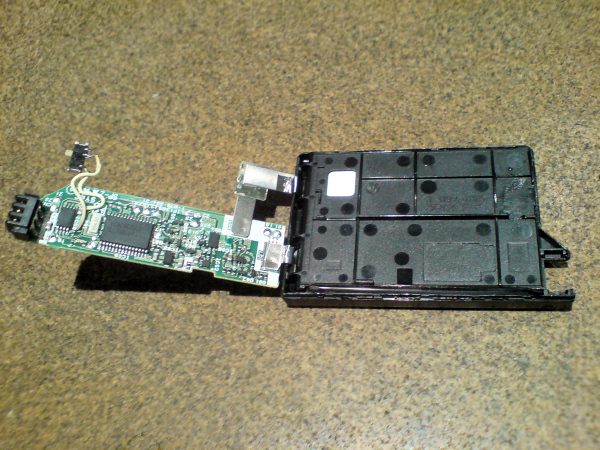
Step two:
You will see a small PCB.
Gently bend it back like in the picture below.
Be careful with that, as the battery is connected with the board
by two thin foils.
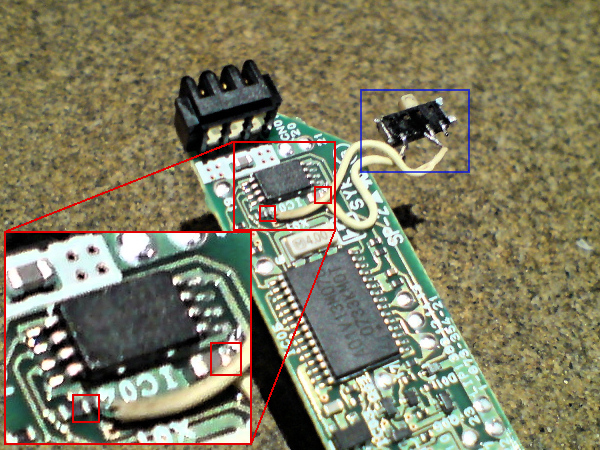
Step three:
Now you have to solder thin wires to the two small contacts
i have marked in the picture with red rectangles.
My wires are from a 80-conductor IDE cable. I don't think that
you can take much thicker wires because space is very rare.
Don't leave your soldering iron on the contacts too long,
as this will destroy the parts. At this step you also have to
solder a very thin on/off switch to the other end of the
wires (blue rectangle). I got mine from a broken usb memory stick, at which it.
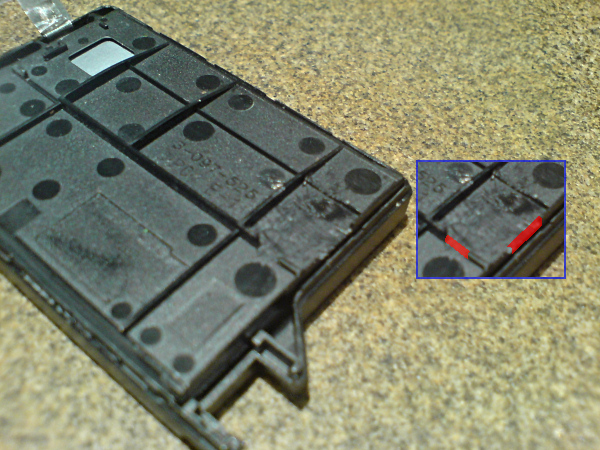
Step four:
You have to cut away some plastic from the lower side of
the battery to route the wires and to make a hole for the swich.
I marked the spots where i cut it away red
in the blue box.
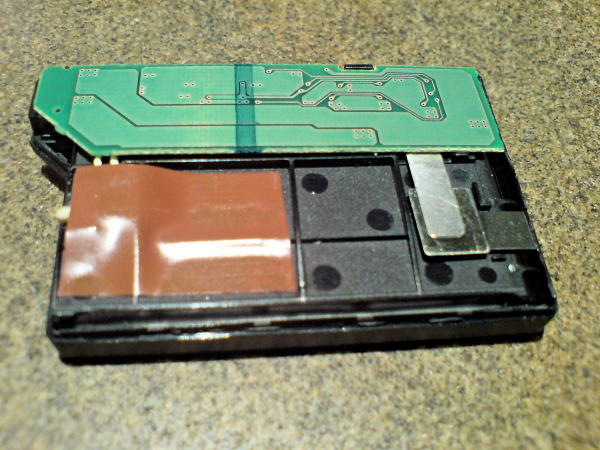
Step five:
Now gently bend the PCB back to it's normal place and
route the cables and the switch to their final location.

Step six:
Now fix the switch to stay in it's place with some superglue or duct tape.
I would recommend duct tape first, to correct something, if you did
something wrong. The switch mustn't overhang, cause else
the battery will not fit in your psp anymore.
Step seven and eight:
Also cut away some plastic at the upper half of the battery
at the same position where you cut it away on the lower half, so
that you can reach the switch inside. You can see in the pic
how much you have to cut away approximately.
After that put the halves back together again and fix them with
some superglue or duct tape.
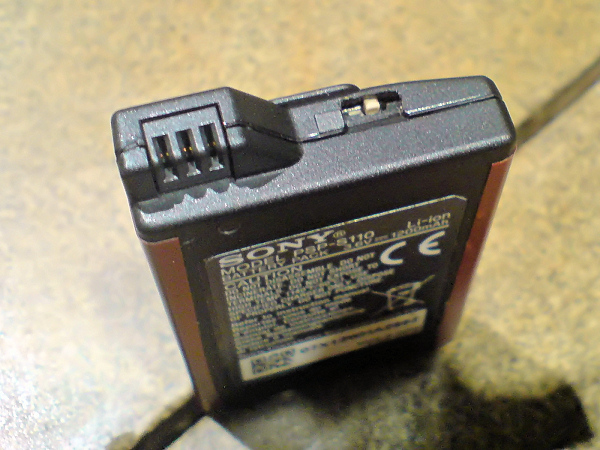
| This guide and tute has been
written based on a PSP Slim PSP-s110 battery. For phat psp users, this
is the connection that must be made. FULL GUIDE AND IMAGES AT RELEASE THREAD FULL GUIDE AND IMAGES AT RELEASE THREAD__________________________________________________ __________________ A Poor Man's BatteryThe following poor mans hardware guide to creating a Pandora Battery is aimed towards the non-handy man type. With that said you may potentially render your battery completely useless or cause another unforeseen disaster. Proceed with caution: (Thanks to James L for the guide.) Unfortunately, I didnt have the essential tools, and the soldering
iron didnt seem to want to work (possibly because it had solder on
it). So I found a small way around using the essential tools. All you
need is something thats small enough to fit under the pin, a cutting
utensil, and optionally, tape. Non-conductive tape, so NO DUCT TAPE!
Just pry open the battery by pinching the edges (with your teeth or something to that effect).
Once inside, this is optional, but I recommend it. Cut one of the
batteries terminals, preferably, the one with a solid connection cable.
One is solid, one is a flexible metal. Cutting the flexible one is
fine, but it cause the battery to short, a problem Im currently
facing, every once in awhile, causing restarts. Im guessing its
because of the flexible material moving around inside the battery when
the PSP is moved. Make sure to bend the metal GENTLY so that they
cannot touch while you proceed.
Then, using your pry tool, make sure to get it just under the
right pin, as seen in the diagrams. Preferably, get something that can
wedge diagonally in the pin, then twist it.
Tape the battery terminal back together if you cut it, once youve safely removed the pin.
Put the battery back together. Dont worry, it wont snap
together, thus, more tape! Wrap tape, and yes, you CAN you duct tape
here, around the battery to hold it together. Scotch tape is
recommended, because its not bulky, so it doesnt prevent the battery
from going in smoothly.
And thats all there is to it. I was going to attempt to make a
switchable service battery (even though this is possible VIA software,
but it would have been cool to have), but the pin broke COMPLETELY off.
Oh well. | PSP Slim Psp Phat eurasis.nu | |
|


